Write Rasbian to MicroSD card in OS X
Preface
There are for more in-depth guides on how to do this on the web. The following is what I reference in other posts on this site and what I use as a reminder for myself.
instructions are for OS X and all examples are from a MacBook Pro
Get Rasbian
Rasbian is basically Debian optimized for Raspberry Pi devices. See the Rasbian website for more info.
I don’t use graphical interfaces on my devices so I just use the lite version of the image from the rasbian download page since all I need is terminal access. This image is much smaller in size and you’ll have far less number of processes running (since no desktop) which will free up memory and CPU cycles for fun stuff.
I also make doubly sure that Wi-Fi connectivity is working and is correct from a cold boot when I first provision a new Pi. Whenever I want to play, I just SSH in for terminal access.
Prepare MicroSD Card
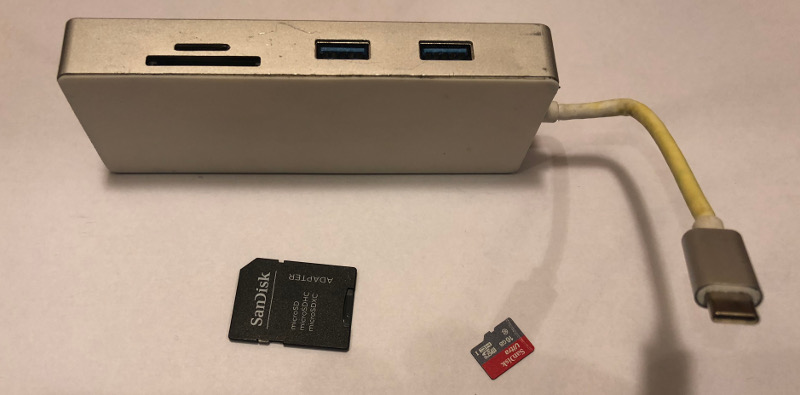
Just so you are clear, you have all sorts of options to “talk to” MicroSD cards. In my case, I have a cheap USB-C adapter that includes a MicroSD card slot (it also has one for the larger adapter).
If you are putting the MicroSD card into the adapter card, make sure it’s not “locked” which would mean you can only read data from it (writes are prevented). Usually, this requires you to slide the lock “forward”; towards the end you plug into the slot.
USB-C SD Card Reader
Before plugging in your MicroSD card to your computer, take a look at your current disks. This will give you a base-line of currently mounted disks. Make sure NOT to write the Raspbian image to any of the disks.
$ diskutil list

/dev/disk0 (internal):
   #:                       TYPE NAME                    SIZE       IDENTIFIER
   0:      GUID_partition_scheme                         500.3 GB   disk0
   1:                        EFI EFI                     314.6 MB   disk0s1
   2:          Apple_CoreStorage Macintosh HD            499.3 GB   disk0s2
   3:                 Apple_Boot Recovery HD             650.0 MB   disk0s3

/dev/disk1 (internal, virtual):
   #:                       TYPE NAME                    SIZE       IDENTIFIER
   0:                            Macintosh HD           +499.0 GB   disk1
                                 Logical Volume on disk0s2
                                 8EE26041-07FE-4E30-92A9-691D3FDDFB08
                                 Unencrypted
Next, I plugged the MicroSD card up to my laptop to get down to business.
$ diskutil list
<same as before, but with /dev/disk2 or another device added>
You’ll need to unmount the MicroSD card since your OS happily mounts it for you when you plug it
in. If you were to forget this step, you wouldn' tbe able to format this disk and the OS will
rely with a device busy error message.
$ diskutil unmountDisk /dev/disk2
Now, it’s time to write the Raspbian image to the SD card.
# Download the Rasbian image.
$ curl -o rasbian.zip https://downloads.raspberrypi.org/raspbian_lite_latest

# Decompress the .zip file to get to the .img file.
$ unzip rasbian.zip

# Take note of the bottom file name listed...
$ ls -ltr *.img

# Write the image to the MicroSD card (use the filename listed previously)
$ sudo dd bs=1m if=2017-11-29-raspbian-stretch-lite.img of=/dev/rdisk2
In most cases, I want SSH and Wi-Fi to work from the first time the Pi is booted. This allows me to work on the Pi without ever hooking up a monitor and keyboard. You can expedite this config by doing a few tricks unique to Rasbian.
If you have been following along, you’ll have your MicroSD card freshly provisioned with Rasbian.
This means that you have a MicroSD card that contains a /boot partition of MS-DOS partition type
that is read/writable from OS X. We can place some files on this mounted partition and Rasbian will
do some magic for us.
$ mount | grep boot
# Your command output might defer.
$ /dev/disk2s1 on /Volumes/boot (msdos, local, nodev, nosuid, noowners)
If you don’t see a
/bootpartition similar to the above, try taking the MicroSD card (or reader) out of the machine and reconnecting it. Run themountcommand above again.
-
Enable SSH access by making the
sshfile existtouch /Volumes/boot/ssh -
Set Wi-Fi network name and (optional) password
You can establish a
wpa_supplicant.confconfig to connect to a wireless network by simply making the file exist in the root of the mounted/bootpartition. In this my case, all I usually need is config for a simple WPA(2) access point with a password. Seewpa_supplicant.confdocs for more details. If anything, skip this step now and configure the Wi-Fi manually with a running board and save that config in your notes for next time.To do it all in one command:
- Write to the file
wpa_supplicant.confto the mounted/bootpartition on your MicroSD card usually at/Volumes/boot/ - Change the
countryaccordingly.- Use the ISO 3166-1 two-letter code
- Update
ssid - Remove the
psk=line if you do not need a password
$ cat > /Volumes/boot/wpa_supplicant.conf <<EOF country=US ctrl_interface=DIR=/var/run/wpa_supplicant GROUP=netdev update_config=1 network={ ssid="your network name" psk="" } EOF - Write to the file
Be sure to safely eject the MicroSD card! Otherwise, you might get some weird errors due to corruption. Your Pi might not boot as well.
$ diskutil eject /dev/disk2
Terminal Access
Supposing you setup Wi-Fi the way we mentioned previously, the Pi should be able to join the Wi-Fi network on boot (fingers crossed).
If you have the Pi on a monitor, you should see the IP address listed on the screen. Otherwise, you can use Pi Finder to automate finding the Pi on the network.
SSH to the Pi with a username of pi and password of raspberry.
Set Up Raspbian Defaults
Configure various Raspberry Pi specific settings:
$ sudo raspi-config
- Change User Password
- optional, but recommended since the default username/password is well published
- Network Options
- Hostname
- optional, but useful for identification when you have multiple Pi devices
- Wi-Fi
- see how to do this during the MicroSD card setup above
- to do this later, just edit
/etc/wpa_supplicant/wpa_supplicant.conf
- Hostname
- Localisation Options
- Change Timezone
- correct the timezone so times are correct
- Change Timezone
- Interfacing Options
- Camera
- only needed for a Pi Camera
- SSH
- only needed for remote terminal access so you won’t need a monitor
- see how to do this during the MicroSD card setup above
- Camera
Upgrade the system
Once you get online, this is a great time to get the system updated before you start configuring it.
$ sudo apt-get update
$ sudo apt-get upgrade -y
$ sudo apt-get dist-upgrade -y
$ sudo apt-get autoremove